Import MBOX to Dovecot Server: Mailbox Migration Guide


When we move any file from one email environment to another, it becomes a daunting task. The same goes for the migration of MBOX files. In this article, we will outline the major reasons and corresponding solutions for importing MBOX to Dovecot Server. If you are new to this term, we have described the best way to do it.
Here, we will cover different variants of approaches to move MBOX to Dovecot Server. First, we will use the server-side command for technically proficient users. Next, we use a widely accessible method that is with a desktop email client, here we used Thunderbird, to import MBOX to Dovecot server. If you find either of these methods too challenging, then look no further; get the professional tool.
MBOX Files & Dovecot – Overview
MBOX is a simple file format for storing a collection of email messages in a single file. The MBOX files originated and were first implemented in the UNIX System. It is a plain text document. Usually, separate email messages are merged into one file with a separator, e.g. a From line, which indicates the beginning of a new message. This line includes the sender’s address and the time of sending. The email content is the part of the file that comes after the separator.
Dovecot is an open-source IMAP and POP3 server designed for Linux. It is known for its security, performance, and simplicity.
Function of Dovecot Server – Like any other email server, its main purpose is to act as a mail storage server. It receives emails from Mail Transfer Agents like Postfix, Exim, and Dovecot. It provides a way for the users to access and manage the mailboxes via an email client (Thunderbird, Outlook or a webmail interface).
Why is it Popular Choice?
- IMAP and POP3 Support: Dovecot is capable of both protocols, which means users can get the mail through different clients and devices.
- Safety: As mentioned earlier, Dovecot has been built with security as the primary feature. It provides features like secure authentication and SSL/TLS encryption.
- Flexibility: Dovecot is a resourceful mail server that can be used for both small and large-scale email systems.
Note: Dovecot is one of the most popular IMAP servers. If you’re looking for a more general guide that applies to other IMAP servers as well, see: Import MBOX to IMAP Server.
How to Import MBOX to Dovecot Server?
Dovecot prefers the Maildir format. A format that stores email as individual files within a directory. Therefore, we first need to convert the MBOX files to Maildir. However, the challenge here is to convert and import the single-file MBOX archives to a multi-file Maildir layout. Therefore, we will give two different methods: the manual with command line method and with automated, user-friendly and can be used without any technical skills.
Method 1: Using Server Side-Command Line
The method is the most direct one using Dovecot’s built-in administration tool, doveadm. Below are the requirements to perform the procedure:
- SSH Access: With SSH login to Dovecot.
- MBOX File Location: Make sure the MBOX files are uploaded to an accessible location.
- Dovecot User: Must know the full email address or username of the Dovecot Account when importing the mail.
Step 1: Run the command
The “doveadm import” command allows you to specify the source format and destination user to import MBOX to Dovecot Server. Source is provided as a mailbox format: path.
Command
doveadm import -u <destination_user> mbox:<path/to/your/mbox_file> <target_folder>
Example: To import a download.mbox into user user@xyz.com INBOX:
doveadm import -u user@xyz.com mbox:/home/user/download.mbox INBOX
If you have to import into a new subfolder, for instance: “New MBOX Folder”
doveadm import -u user@example.com mbox:/home/user/download.mbox “New MBOX Folder”
Step 2: Wait to Complete
The command will run and may take some time depending on the size of the MBOX file. doveadm import handles performs the reading and conversion of MBOX files’ individual messages into Dovecot users’ native format, which usually is Maildir or dbox.
Method 2: Import MBOX to Dovecot Server using IMAP Client
Here, we are using the most common approach of transferring emails to a server account. We are using the Thunderbird email client to connect to Dovecot and perform the migration via IMAP protocol. This is best when you only have a few files to transfer.
Step 1: Import MBOX files
- Open Thunderbird Application.
- Right-click on the Local folder ( Create on)
- Select ImportExportTools NG > Import MBOX file.
- Choose the option “Import one or more mbox files directly” and select MBOX files.
- Selected MBOX files will appear in Thunderbird.
Step 2: Add Dovecot Account with IMAP Configuration
- In Thunderbird, go to Menu > Account Settings.
- Click on New Account > Mail Account.
- Enter the details of the Dovecot Account email address.
- Enter the below-mentioned IMAP details:
Incoming (IMAP)
- Hostname: Your server address (e.g., mail.yourdomain.com)
- Port: 993
- Connection Security: SSL/TLS
- Authentication Method: Normal password
- Username: Your full email address
Outgoing (SMTP)
- Hostname: Your server address (e.g., mail.yourdomain.com)
- Port: 587
- Connection Security: STARTTLS
- Authentication Method: Normal password
- Username: Your full email address
After setting up the account, perform the next procedure.
Step 3: Import MBOX to Dovecot Server Account
- Go to the newly imported folder.
- Select all the emails you want to move.
- Drag and drop the selected emails to the desired folder under the Dovecot IMAP account.
Step 4: Synchronisation
The MBOX files will not be uploaded to the Dovecot server using the IMAP protocol. The Dovecot server will receive the messages and then save them in the maildir or dbox structure.
Method 3: Professionally Import MBOX to Dovecot Server
Get the MBOX File Converter to import multiple MBOX files into the Dovecot server without the need for any complex steps. Use the IMAP option to migrate the mailboxes into the Dovecot Account. The method ensures the original folder structure and the email properties are maintained during the procedure while keeping the steps minimal. It offers a direct-to-server connection by bypassing the manual and error-prone process of using the Desktop email client.
How to Move MBOX File to Dovecot Account?
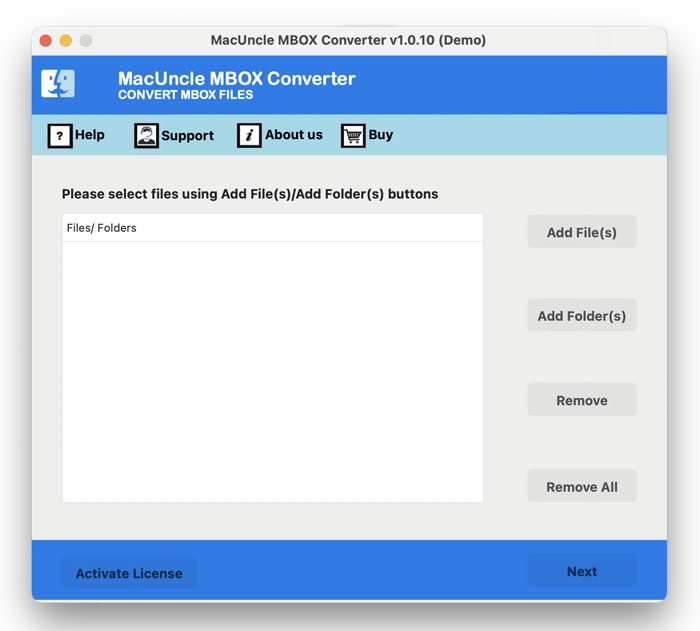
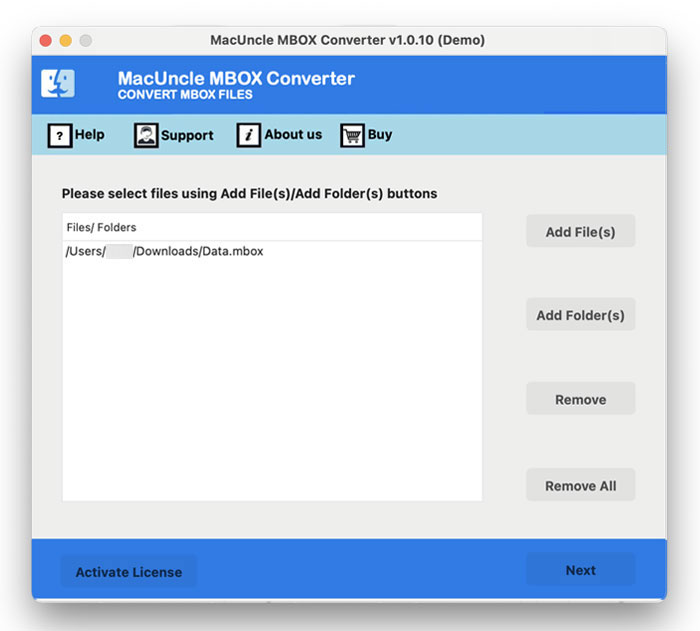
- Start the tool on the system.

- Use the Add button to upload MBOX files and press the Next button.
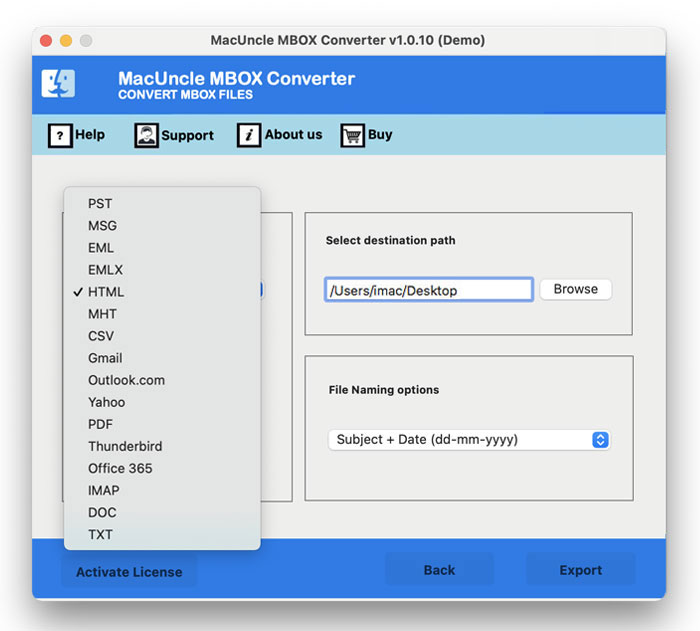
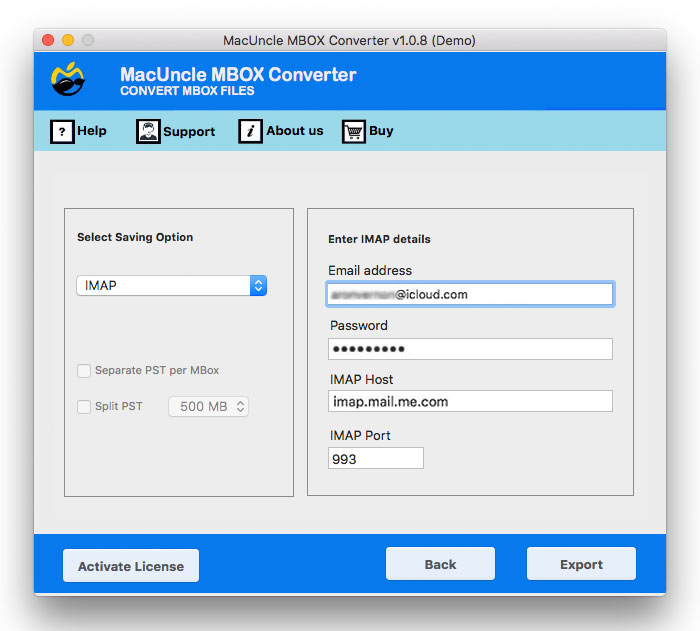
- Now select IMAP from the options and enter all the details.
- Press the Export button.
Soon, the process to import MBOX to Dovecot Server starts.
Conclusion
In conclusion, the transferring of data between email environments, especially moving MBOX to Dovecot Server, can seem daunting. The write-up has provided a simple & quick solution. We have presented two different methods to import MBOX to Dovecot server, with one being a server-side command with the doveadm import command for experienced users with SSH access and the other with client-based using the IMAP client; here, we used Thunderbird. And for more error-free and high-volume migration, which preserves folder integrity, that is the MBOX Converter. By understanding each of these methods, users can successfully import the MBOX data into the robust Dovecot environment.