How to Import OST to Office 365 Account ?


Transferring data from OST (Outlook Offline Storage Table) to Office 365 is not a simple task, as it is a frequent need of individuals and organisations. For those who are shifting to the cloud for their motive. The process to import OST to Office 365 is neither direct nor simple and involves several requirements, which have different levels of complexity. This guide is here to simplify these methods and provide you with a quick approach for migration.
Can You Import OST File to Office 365 Directly?
Simple answer, No. Office 365 does not natively support a direct import option for the OST file. Instead, convert OST to PST or use specialised migration services. Here are some of the proven methods to move OST data into Microsoft 365.
Why Migrate OST to Office 365 Account
An OST file is a local copy of your Exchange mailbox data stored on your computer. It allows you to work offline and synchronises changes with the Exchange server when a connection is available. However, OST files are not directly compatible with Office 365. Therefore, a conversion or migration process is necessary. Reasons for needing to import OST to Office 365 include:
- Server Migration: Moving from an on-premises Exchange server to Office 365.
- Data Recovery: Recovering mailbox data from an orphaned or inaccessible OST file.
- User Transition: Moving user mailboxes to a cloud-based environment.
- Backup and Archiving: Creating a secure and accessible mailbox data backup in Office 365.
Methods to Import OST to Office 365 Accounts
We can manually try to import the OST files to Office 365, but it is important to keep in mind that Office 365 does not support the direct import of Outlook data files. Therefore, we need to convert to the appropriate format and then transfer to Azure.
Convert OST to PST and Import to Office 365
- Start Outlook, go to File> Open & Export > Import/Export.
- Choose “Export to file“, then “Outlook Data File” and select the files you want to export.
- Save it as a PST file.
In this method, we will convert the files into the Personal Storage Table file, and that file can be imported into Office 365.
Import the Files to Office 365 with Network Upload
- Access the Office 365 admin centre and navigate to the import section.
- Create an import job and obtain the Azure storage URL and SAS key.
- Use the AzCopy.exe tool to upload the PST file to the Azure Storage location.
- Create a CSV mapping file to map the PST files to the target user mailboxes.
- Submit the import job.
Limitations: When performing these steps with an orphan OST, the process will fail. The method takes time if you are processing large OST files. We need to perform the conversion anyway, as there is no direct import option.
How to Import OST to Office 365 Mailbox Directly?
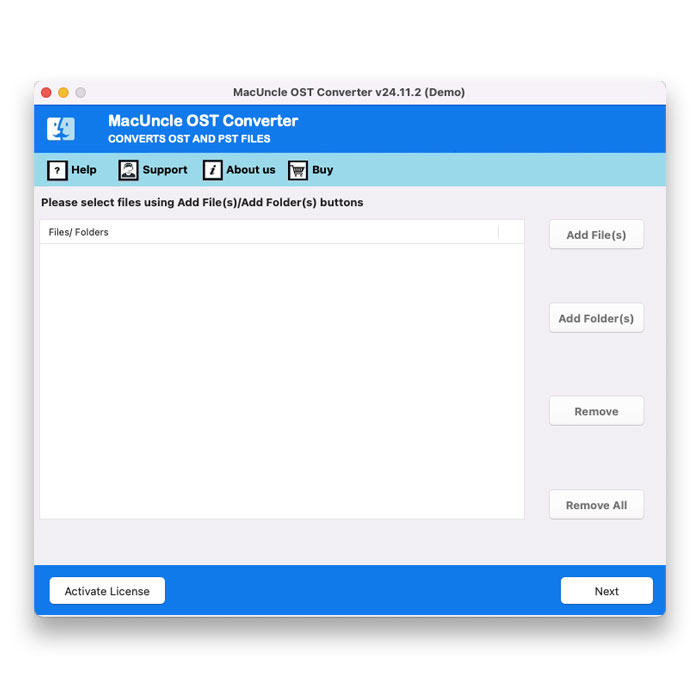
On account of performing these two procedures would be hectic. Therefore, we recommended utilising dedicated OST Converter tools to offer a fully automated and often more efficient pathway to import OST to Office 365. These tools are designed to streamline the migration process, especially for organisations with large volumes of data or those seeking ongoing backup and recovery solutions.
- Launch the software to migrate the OST file into Office 365.

- Add the OST file to the software panel.
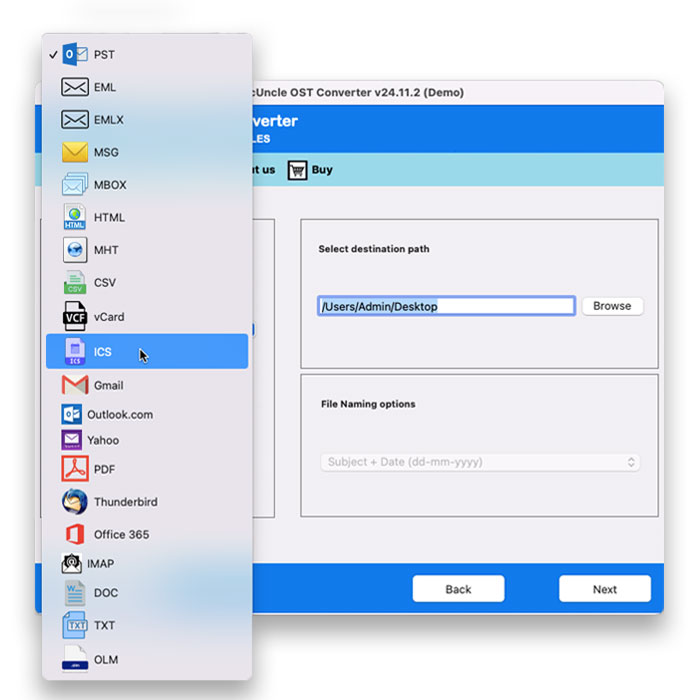
- Choose Office 365 from the options.
- Enter the Office 365 ID and password in the new tab.
- Press the accept button and select the desired folder.
- Use the Filter option to transfer the OST files into the O365 selectively.
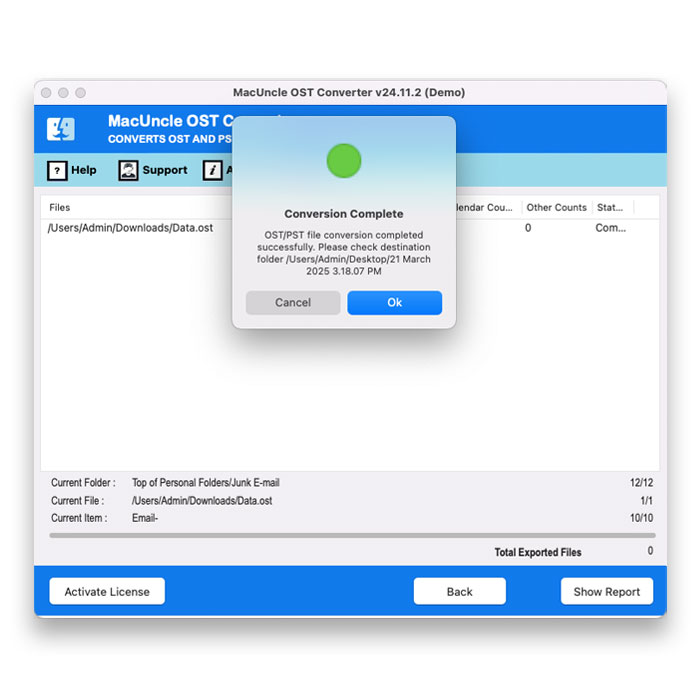
- Finally, press the Export button.

Conclusion
We have discussed all the possible ways to import OST to Office 365 accounts. Since there is no direct approach to import an OST file into Office 365, we need to save the OST in an appropriate format to complete the manual method. Therefore, we have the right solution to directly move the OST file to the O365 account.