How to Add GMX to Gmail Account Directly?


Many users wish to migrate GMX Emails to Gmail for some reason. Many want to switch to a more easy-to-go Email client or some people are experiencing certain security issues with GMX Email. To preserve your important emails, we have come up with a concise and clear way to resolve your problem in just a few minutes. Read the Article and add GMX to Gmail on Mac OS effortlessly.
Adding the GMX email account to the Gmail interface can significantly ease the migration. Instead of constantly switching to different email platforms, you can migrate important emails to your Google account. With a simple and easy trick, you can effortlessly forward GMX Emails to your Gmail account without any hassle.
Why Gmail Account?
The reasons could be countless, but here are some of the basic reasons to add GMX to Gmail: –
- The functionality of Gmail makes it more accessible to people all around the world; it today has the most active users as compared to GMX, which is a German-based email client.
- The foundation of the big corporations lies merely in Gmail. Therefore, you have to shift to Gmail to have a common email client.
- The management of emails and other information on Gmail using various Google Apps makes it more engaging and advantageous to many users as compared to other email clients.
So, Gmail will be a good option to switch to get additional benefits and perks of the email client.
How to Add GMX to Gmail without any Tool?
Use the POP3 to add a GMX account to Gmail. Here’s how to set it up:
Enable POP3 Access in the GMX Account
Before we add the GMX account to Gmail with POP3, you need to ensure the POP3 access is enabled in the GMX settings.
- Go to the browser and go to the GMX website.
- Log in to the GMX account using the email address and password.
- Then, navigate to the settings.
- Look for “POP3 & IMAP” in “Email settings“.
- Ensure the option “Enable POP3 Access” is selected.
- Save any changes that are made.
Add GMX Account to Google Account
Now, we can go with the configuration of the GMX account with the Gmail/
- First, log in to the Gmail account.
- Click the gear icon in to top right corner.
- Now, select the See all settings. Navigate to the Accounts and Import tab.
- In the “Check email from other accounts” section, click on Add a Mail Account.
- Enter the GMX account details in the required field and click Next.
- Now, select POP3 and click Next.
- Enter the GMX account details:
- Username: GMX email address.
- Password: Enter password
- POP Server: pop.gmx.com
- Port: 995
- Check the box “Always use a secure connection(SSL) when retrieving mail.
- Click Add Account.
Note: Here we are adding the entire account to Gmail, all the old emails and the new ones will be added to the Gmail account.
How to Add GMX to Gmail Accounts? | Expertise Method
If you are thinking of a manual method, then unfortunately, that is not the option available here. You can accomplish the task of migrating GMX to Gmail on Mac using a third-party tool, which can be an alternative to adding the email account. In that case, we would recommend the most promising solution is the GMX Backup Tool.
You can selectively back up your GMX Emails to your Google Mail using the advanced filters option of the tool. Altogether, you can backup or migrate your entire GMX files or folders to any of the email clients directly. The hierarchy of the GMX Emails during the process remains in their original form without any data loss or alteration in the file. The Windows Version works in a similar format to move emails from GMX to the G-Email account.
The tool offers you a dual mode of purchasing, you can either go for the Free trial version to experience the operation of the wizard or you can directly opt for its Pro version.
Here are some of its additional features: –
- You can go for selective or bulk methods to forward GMX emails to Gmail. The application comes with advanced filter options in case of selective migration.
- The tool offers you 100% security and stability, and never saves your GMX credentials. It also comes with a user-friendly GUI, which enables every user to have an effortless and smooth experience.
- The chances of data loss during the process are 0%. There will be no loss of data of any kind, also the folder hierarchy of the GMX emails remains intact.
Get a Solution to Import GMX Email to Outlook 2016, 2013, etc.
How to Import GMX Emails to Gmail?
Follow the steps mentioned to carefully let the user add GMX to Gmail:-
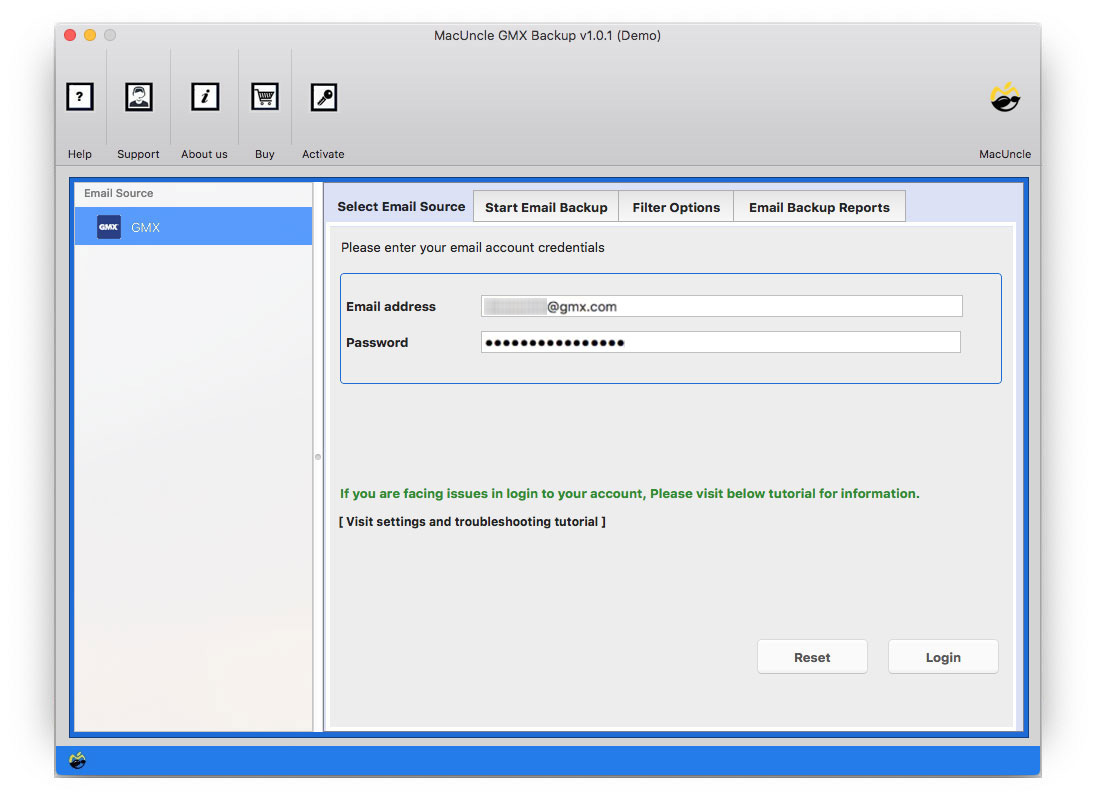
- Step 1. Download the software and start the tool on your Mac.
- Step 2. Select the Email Source Option to enter GMX Mail Credentials.

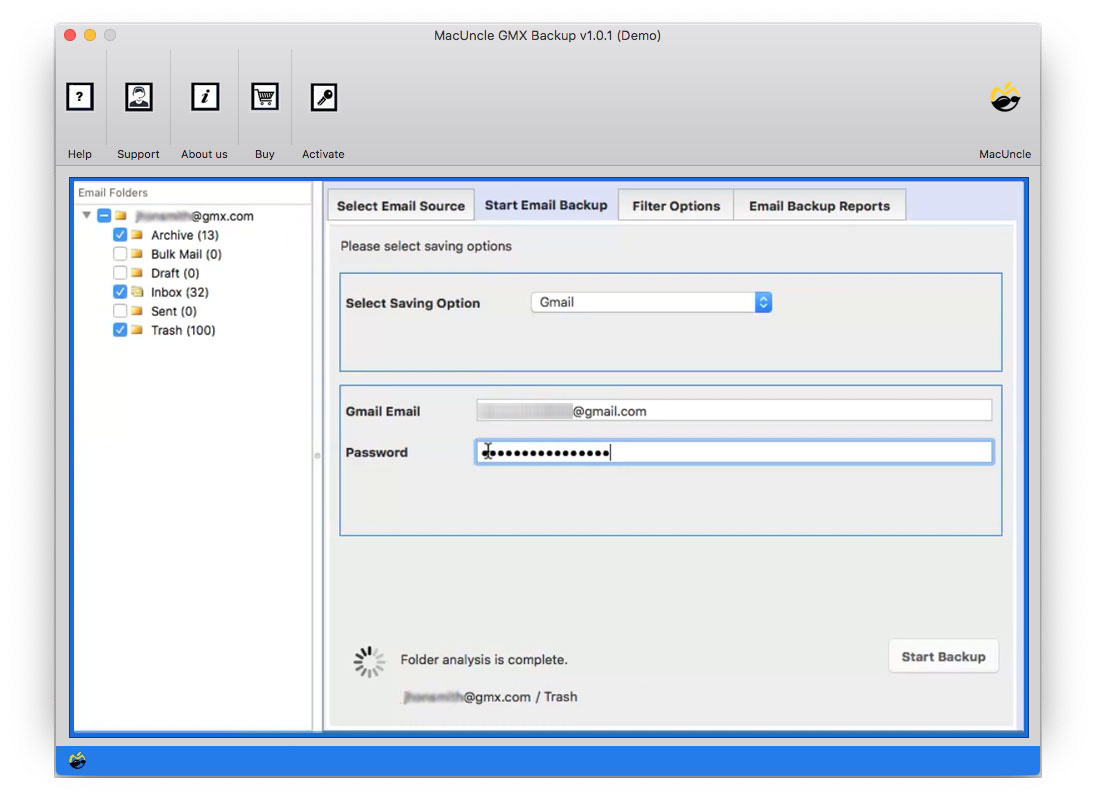
- Step 3. Now choose the email folders which you want to import and then choose Gmail and enter your credentials.
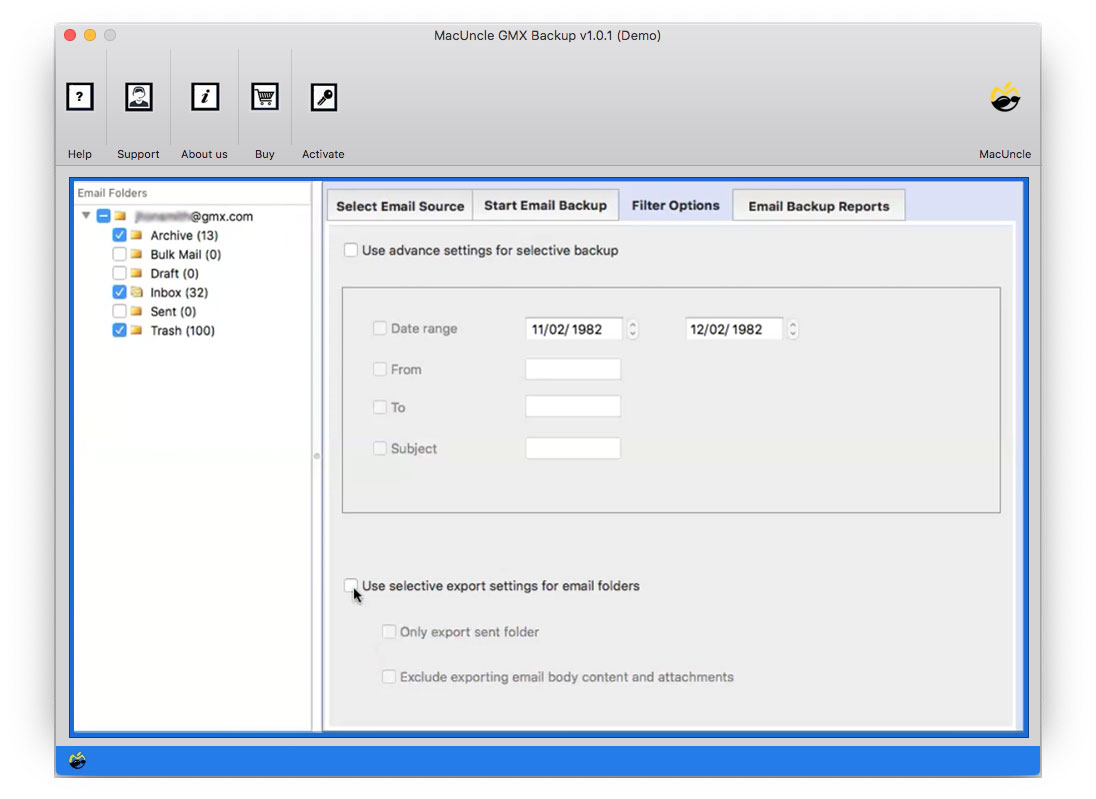
- Step 4. The advanced Filter Options allow you to select specific dates and export selective folders if you want selective migration.
- Step 5. Now go back to Start GMX Backup and choose the destination path. Then hit the Start Backup button.
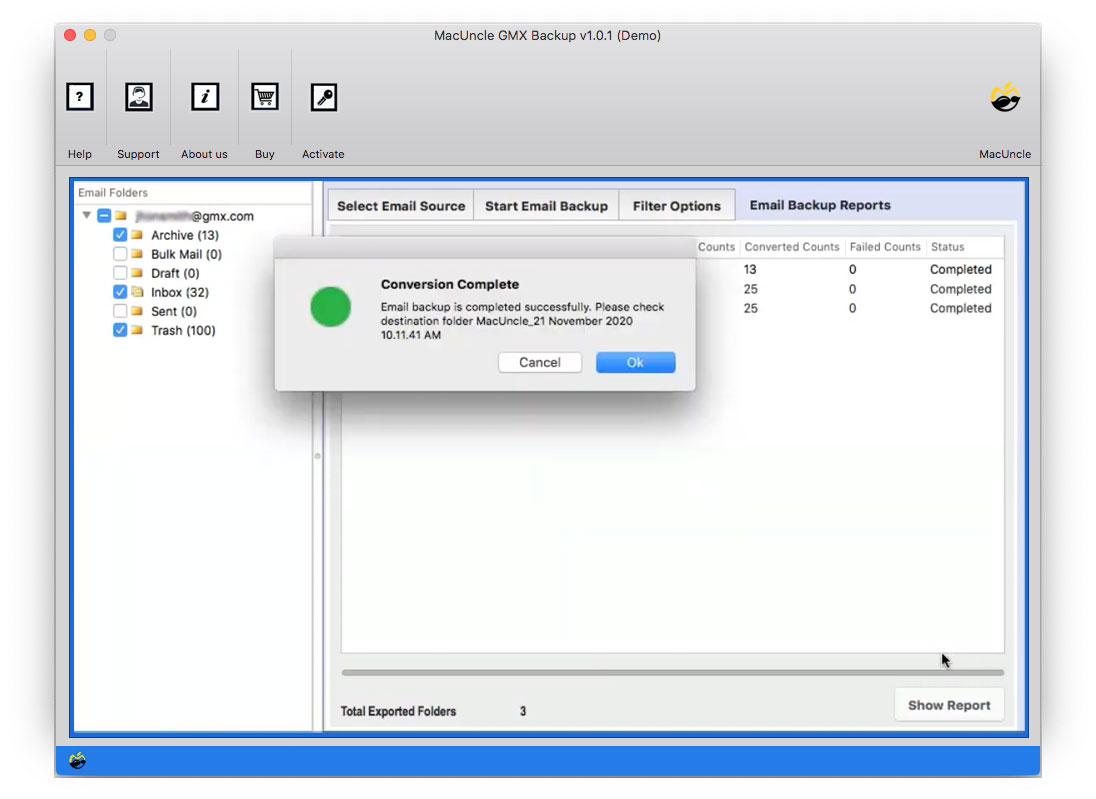
- After waiting for a few minutes, you will get notified regarding the successful GMX Emails to Gmail migration on the System.
Closing Words!
If you have read the entire article, then you must understand the process to add GMX Emails to Gmail on Mac. There are many reasons due to why people prefer to migrate from GMX to Google Mail; the additional benefits, functionality, etc., attract the public to shift to Gmail. Or many people just want to migrate from GMX emails without any reason. If you are the one seeking the solution, then you must read the blog, which gives you a Dynamic tool that could be used to forward GMX emails to Gmail directly without any glitches.