How to Transfer QQ Mail Data to Gmail Account?


Today Let’s see how we can directly transfer QQ Mail to Gmail on Mac OS with the help of one of the MacUncle Tools. Here, you will get the tool and the steps on how the tool works.
We have made the migration of QQ Mail.com to a Gmail account simple with the application Mac Email Backup Software. From this blog, you will get a complete illustration of how the tool operates with a few examples.
QQ Mail & Gmail
Tencent QQ (腾讯QQ) or QQ Mail is a Chinese messaging and web portal developed by giant Tencent. QQ Mail works similarly as another email service by providing a platform to send and receive messages from one end to another. It is considered the 5th most used email client.
On the other hand, Gmail Account is a common and frequent email service used by a large number of people. Due to its high-standard features, Gmail has a vast number of users. Thus, users from variant email clients switch to Gmail accounts to transfer the email data to Google accounts.
Therefore, out of those, QQ Mail users also want to transfer email data to a Gmail account. So, here we will give the best solution to solve the issue.
How to Manually Transfer QQ Mail to Gmail?
To get the emails from QQ Mail to gmail, we can use the Add account features. However, it will
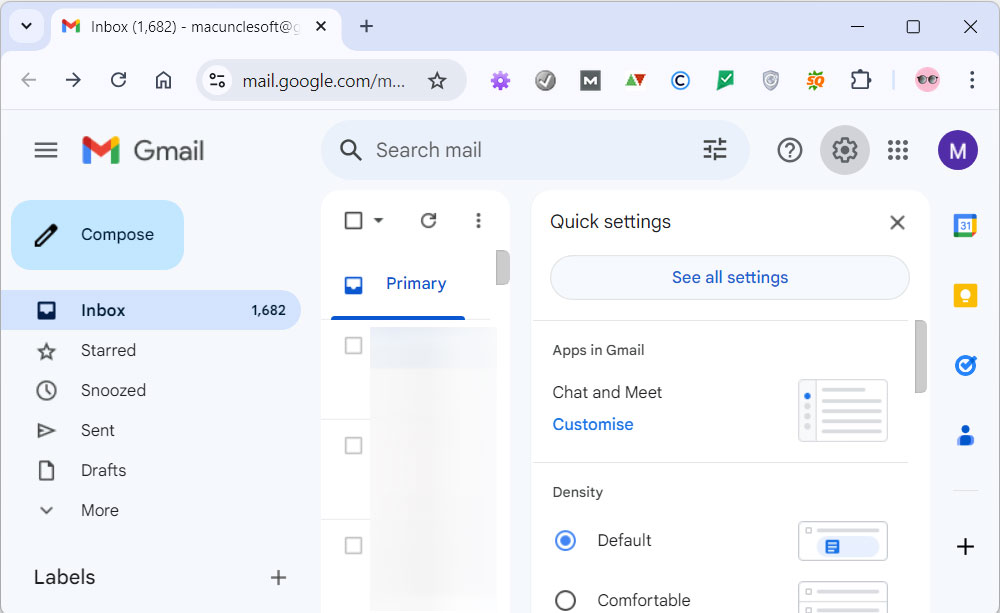
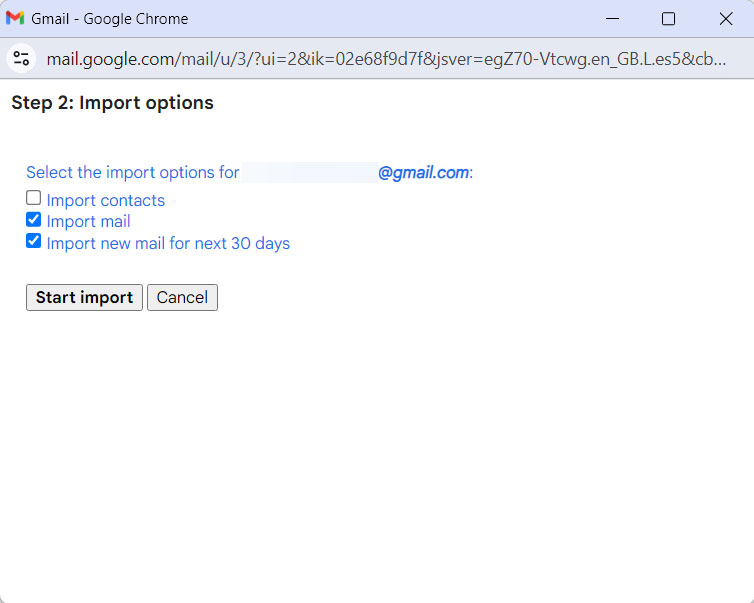
- Sign in to Gmail Account and go to See all Settings.
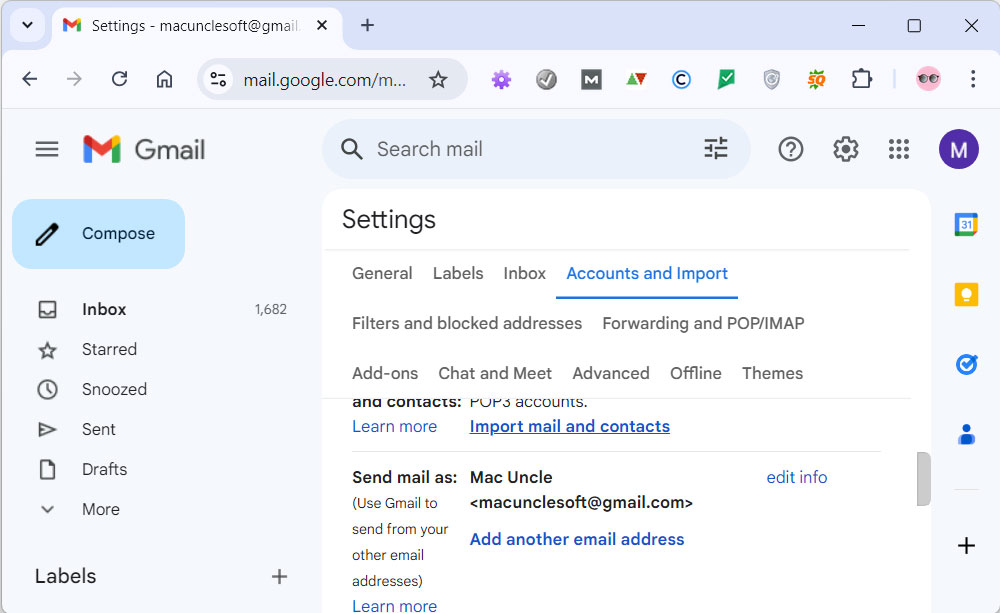
- Now, navigate to “Accounts and Import” and Click on the “Import Mail and Contacts“.

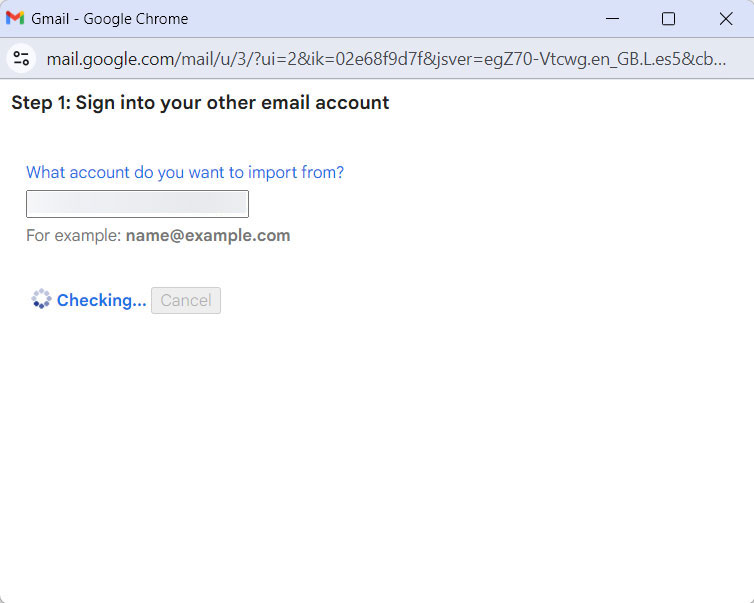
- Enter the QQ Mail account login details and press Log in.

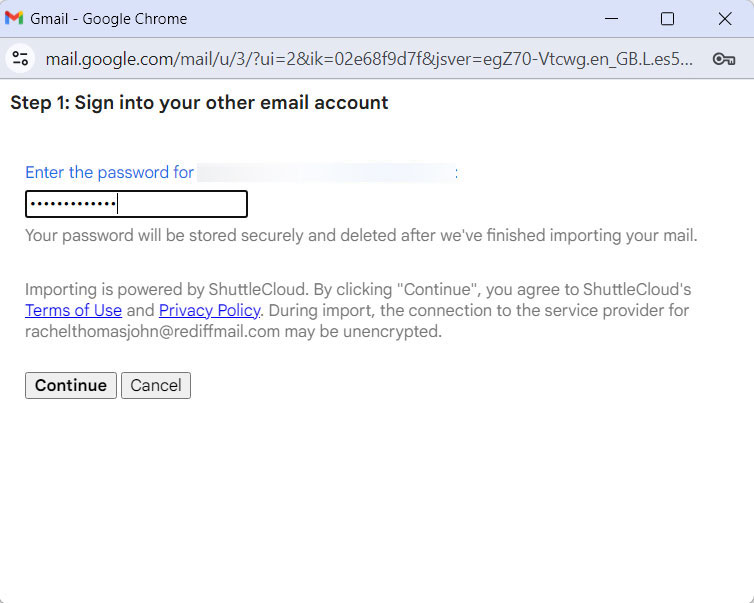
- Enter password and press Next.

- Choose “Import Mail” option from the list and tap on Import.

How to Transfer QQ Mail to Gmail Account?
As above mentioned, tool, the email data from QQ Mail can be migrated to a Gmail account directly. With this tool, transfer multiple email messages and other data without any hassle. Why use any lengthy technical procedure, when you can move the files directly to Gmail without even signing in to the account?
The utility offers a different saving option to download or migrate QQ Mail as the user requests. We will give the complete steps to run the tool with the figure.
Step to Migrate QQ Emails to Gmail Accounts
From the download link, get the tool and install it on any Mac OS version above 10.8 Mountain Lion. Then, simply follow the steps if required.
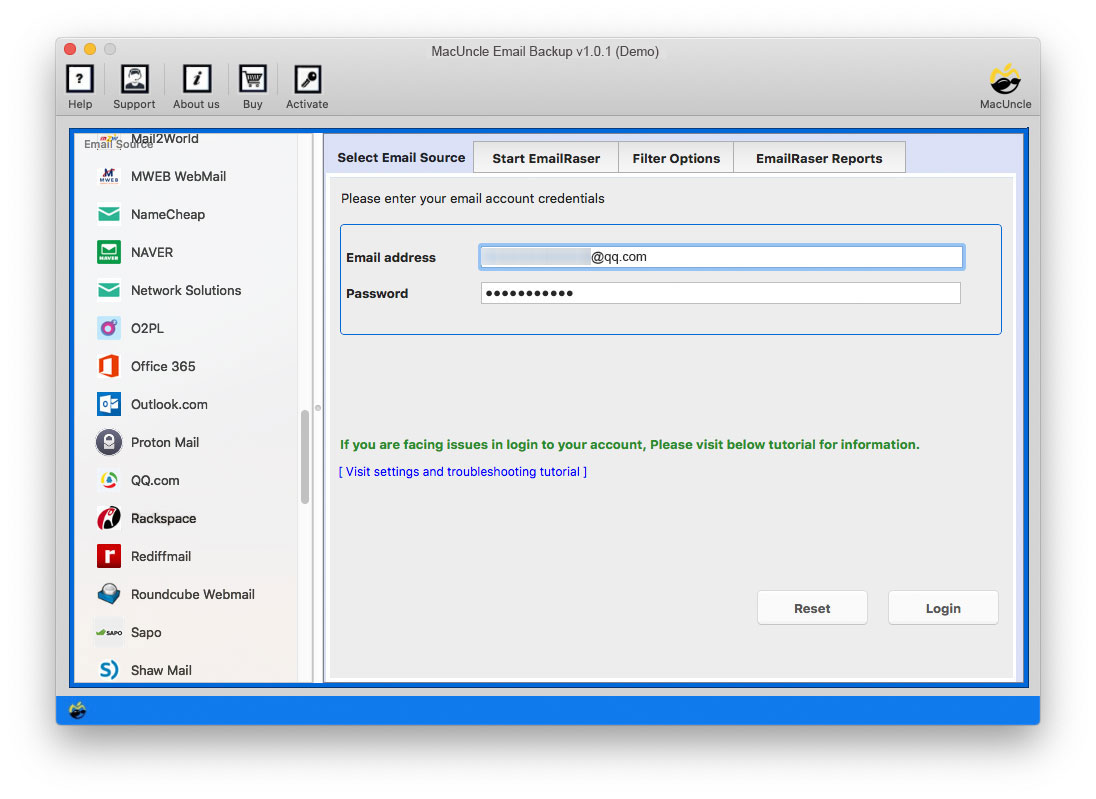
- Step 1: Select QQ Mail from the Email Source and enter the Email credentials in the field given—email Address and App password. Press the Login button. The tool does not work with normal QQ Mail passwords.

- Step 2: Then, the tool loads all the folders on QQ Mail to the Email Files sections. Select the desired folder/subfolder and further go to the next step.
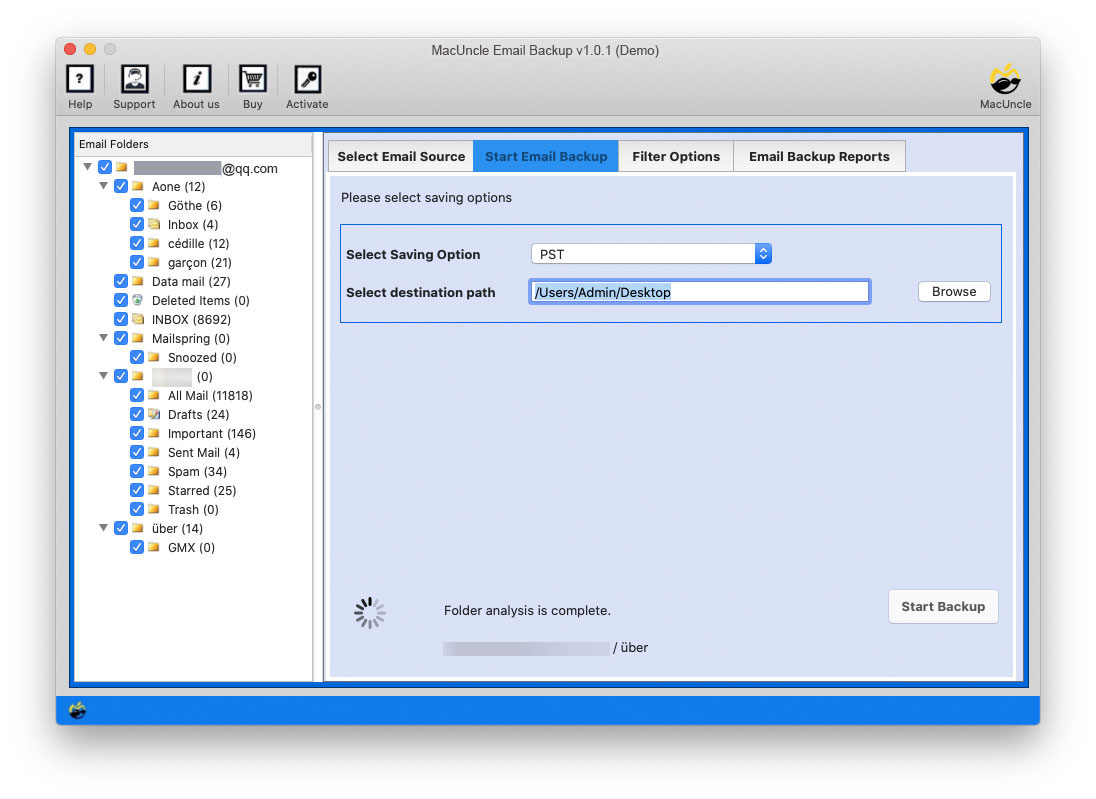
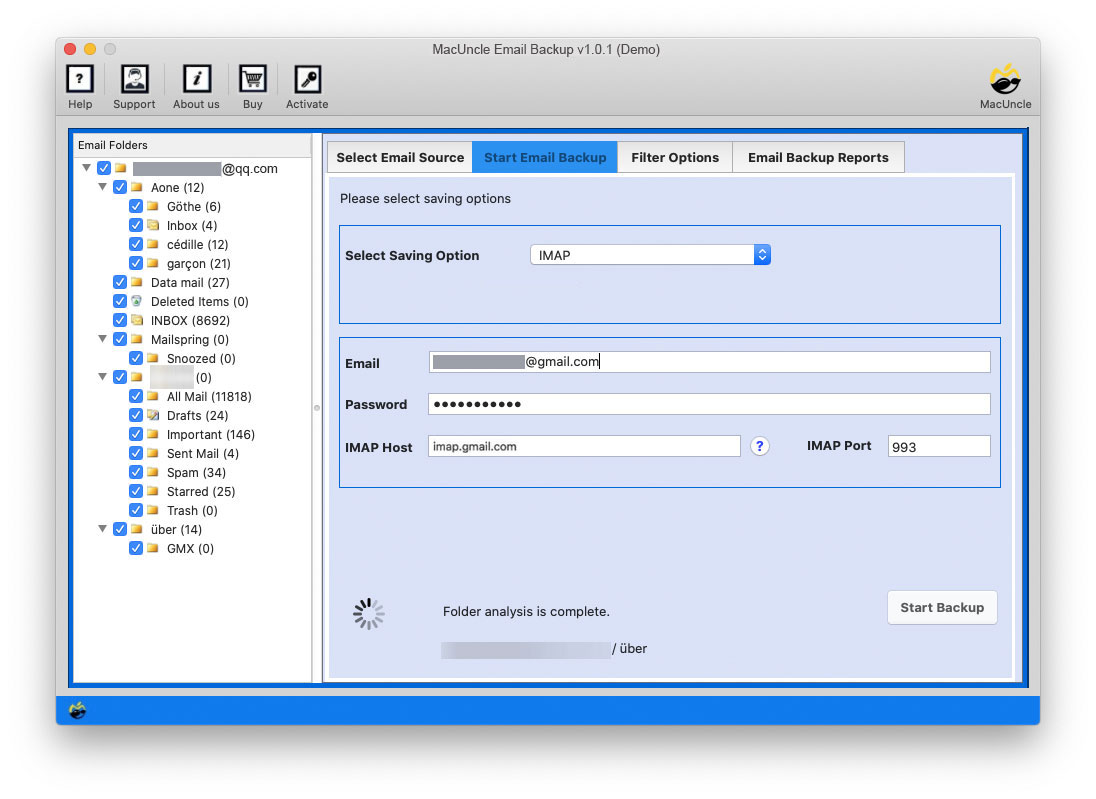
- Step 3. Now, from the Select Saving option, choose the Gmail option or IMAP option as shown in the figure. Enter all the required fields.
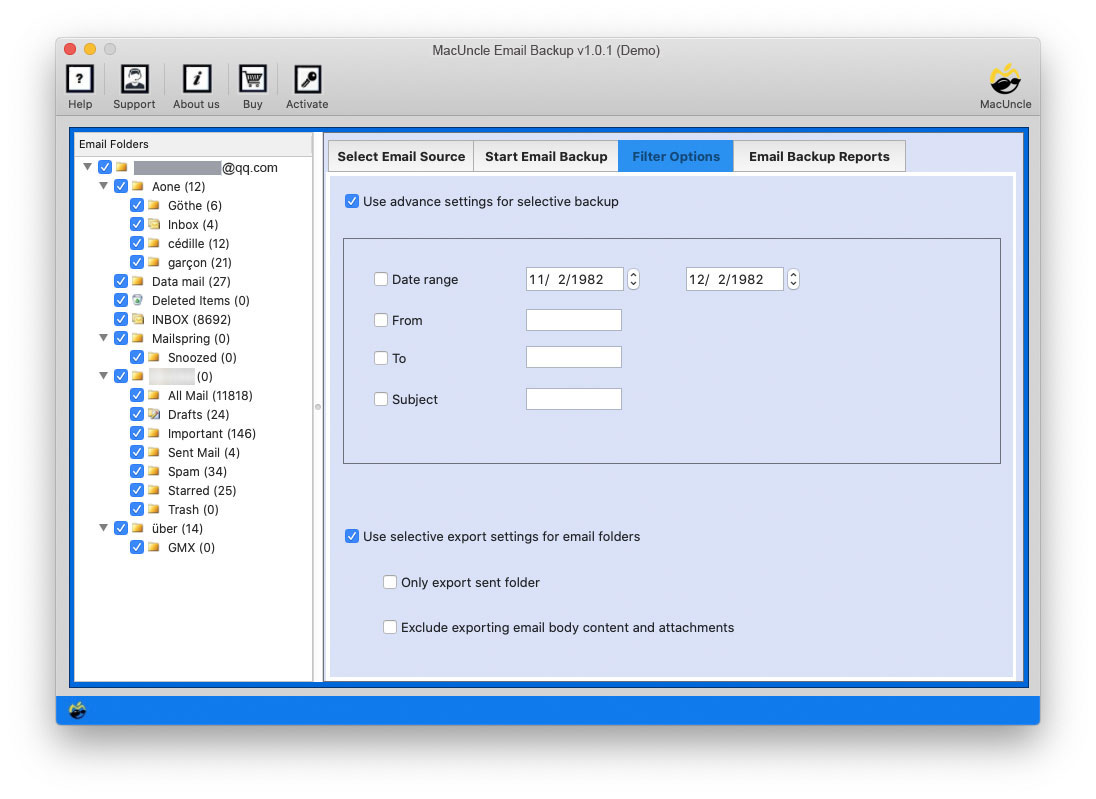
- Step 4. Click on the filter option for selective QQ Mail to Gmail migration. Again, Go back to the Backup option.
- Step 5. Lastly, press the Start Backup button to start transferring QQ Mail to Gmail on Mac OS.
There you go. All the selected QQ Mail emails are now imported to the Google account. Open Gmail and there you will find a folder with QQ Mail data.
Read other related blogs: How to Transfer Email from AT&T to Gmail Account?
Outstanding Traits of the Tool
Here we will discuss what makes the tool worth having. Know about the application before purchasing the professional version.
- Simple Tool with advanced features: From the steps, it is clear that the process is simple. Not only does the tool give a straightforward solution but also a tool with quality features. The whole process can be done by a computer novice to an expert.
- No extra application installation required: While using the tool, MacUncle does not need any external application installation or support to transfer files successfully. Neither QQ Mail installation is required nor the need to access the Gmail account.
- Bulk QQ Emails to Gmail Migration: Users can select any folder from the application panel. Choose single or multiple files and proceed with the process. Either migration of a few or bulk QQ Mail data, the solution is instant with 100% accuracy.
Bottom Line
In conclusion, the writer has derived the solution to “transfer QQ Mail to Gmail on Mac”. With the help of the mentioned solution, migration is possible without any prerequisites. Try the demo version, transfer some of the most important email files or folders, and then later upgrade the utility to its Pro version.
Frequently Asked Questions
Q) How to migrate only some selected folders from QQ to Gmail accounts?
A) Use the recommended software and choose the folders from the QQ mail client. And follow the steps to add QQ emails to Gmail accounts.
Q) Is it possible to transfer emails from the old QQ email account?
A) Yes. Just enter the QQ email credentials to the required field and the software will start to move the emails from one account to another.