How to Transfer Office 365 Emails to iCloud Account?
Moreover, one of the most decisive problems for users is importing contacts from Outlook 2016 to iCloud, allowing contacts from O365 to be viewed on all Mac devices. Contacts often play a vital role in everyone’s life because they allow users to stay connected with each other. Users are therefore attempting to transfer Office 365 to iCloud without any hassle. Business cards allow you to provide personal customer information at work, at home and outside, at meetings, and on the premises.
Let’s start with the expert solution to move Office 365 to iCloud.
Why Do Users Transfer Office 365 to iCloud?
The preference might be different as per the user’s. Let’s consider the following features for which the users want to move Office 365 files to iCloud accounts.
- Simple Integration: iCloud provides quite simple integration with the Apple ecosystem. It becomes a truly cohesive experience across your devices, including iPhone, iPad, and Mac.
- Accessibility: As it can be effortlessly integrated, thus enables you to access your files, emails, and calendar events from anywhere.
- Flexible Pricing: iCloud has multiple plans across different levels of storage capacity, and you can get a very cost-effective key depending on the number of users or needs, for example, for an individual or a small organisation.
- End-to-End Encryption: Some services in iCloud encrypt information both ways, with the key being on either your end or Apple’s end; this includes both iCloud Drive and iCloud Backup. And even when information resides on Apple servers, encryption is still applicable.
- Centralised Control: You can find all your data on one platform, hence easy to locate, access and share your information. This way, you can centralise your data without moving back and forth.
- Ease of Use: The interface of iCloud is very intuitive, such that backing up devices, sharing files, and managing storage has been made relatively easy.
- Other Apple Services: You’ll integrate well with other services, including Apple Music, Apple TV+, and Apple Arcade, which offer an integrated experience with your Apple system.
Is there a Manual Method to Export Office 365 to an iCloud Account?
You can find different approaches to move the emails from an Office 365 configured Outlook account to iCloud, but they can be complex for non-technical users. First user needs to export PST files from the Outlook 365 account and then import PST to Thunderbird Accounts. Later, you need to export the email files and then import them into the Apple Mail account, which is configured with the iCloud account.
The above gives an overview of the manual approach, We therefore have the simple yet advanced steps to directly transfer emails from Office 365 to iCloud.
Export Office 365 to iCloud with the Professional Method
To transfer Office 365 contacts to iCloud, the user can use a trouble-free solution – the Office 365 Backup tool. With this utility, the user can easily store Office 365 mailbox items such as emails, addresses, calendars, etc., in various file formats. Besides, the user can also use data filters when migrating Office 365 data. The utility can import Office 365 emails, contacts, etc., into iCloud/iPhone without causing any modification.
Use the Pro Version of the software for unlimited export features from Office 365 to iCloud accounts.
Download the trial version of the Tool for Mac.
How to Transfer Office 365 to iCloud Account Directly?
Here is the procedure to Import Office 365 to the iCloud Account:
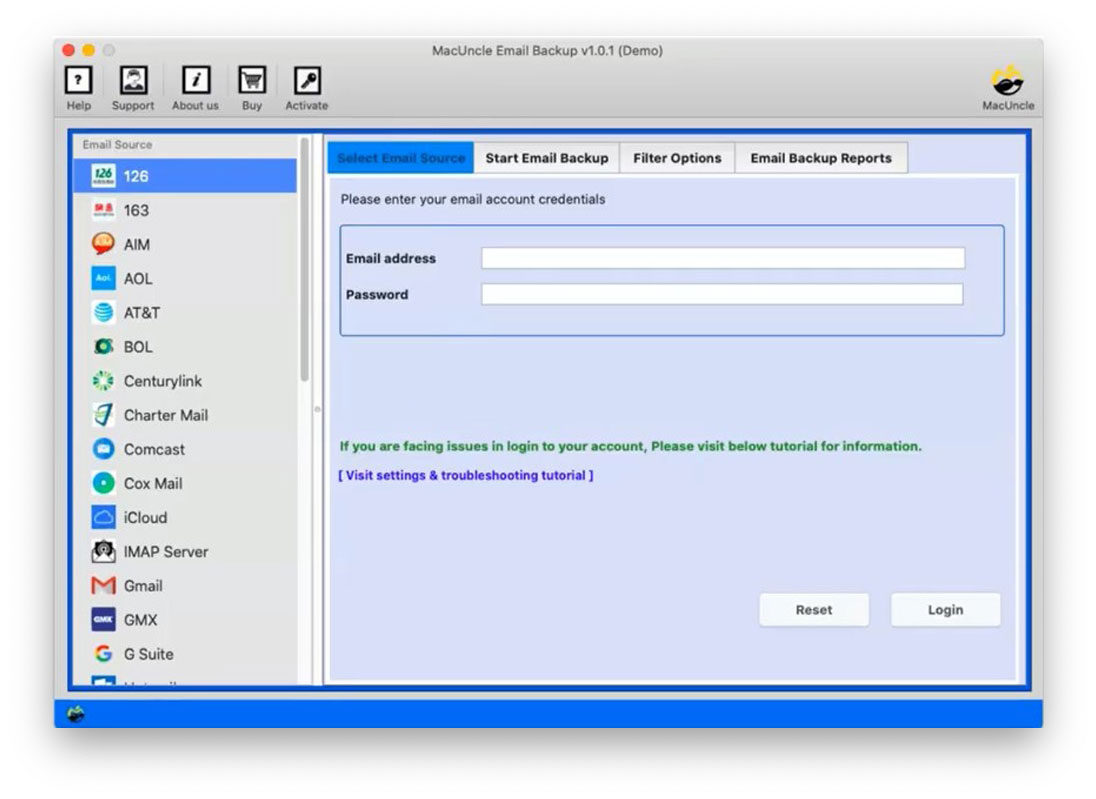
- Step 1: Launch the tool and select Office 365 from the options in the software panel.
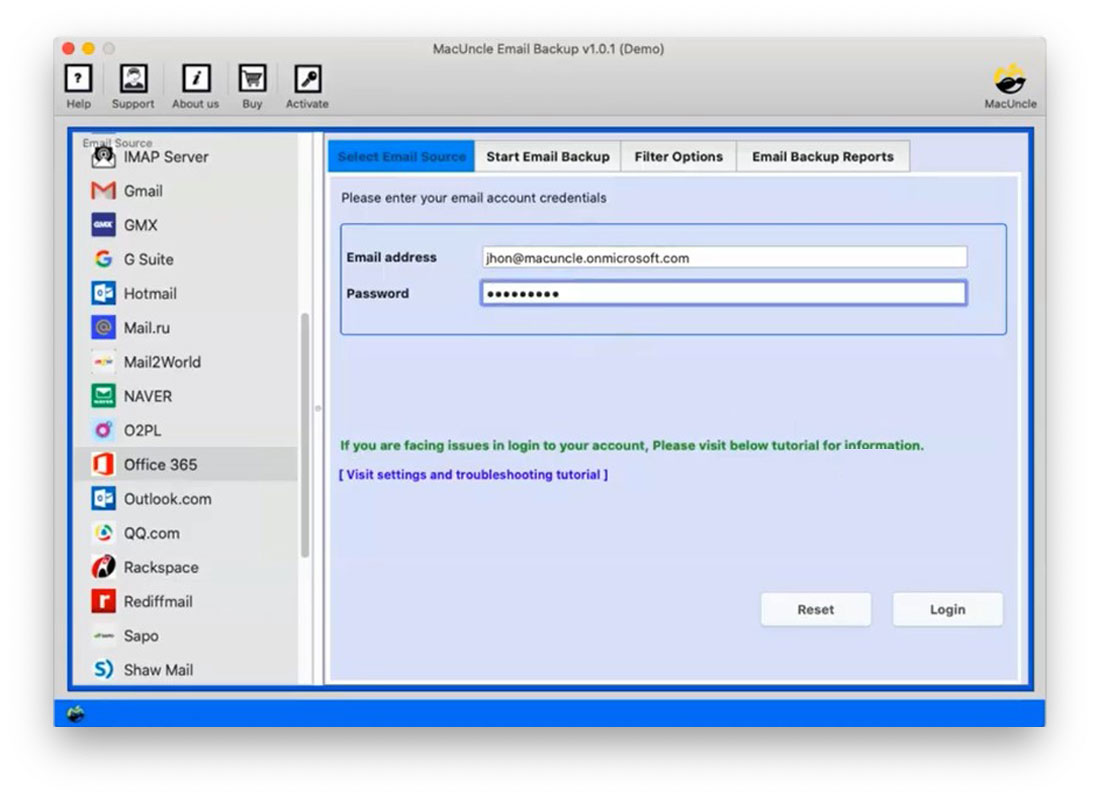
- Step 2: Now, enter the Microsoft 365 account credentials and then click the login button.
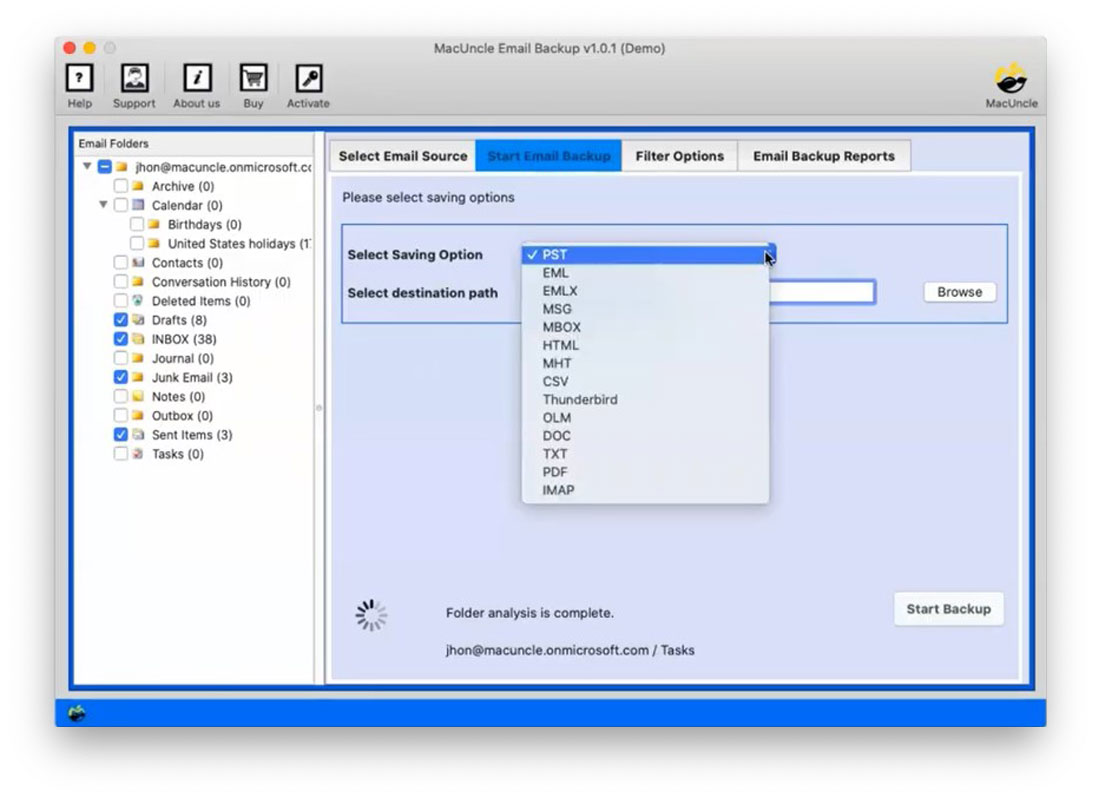
- Step 3: As a result, in no time, the tool loads all the folders in the O365 account
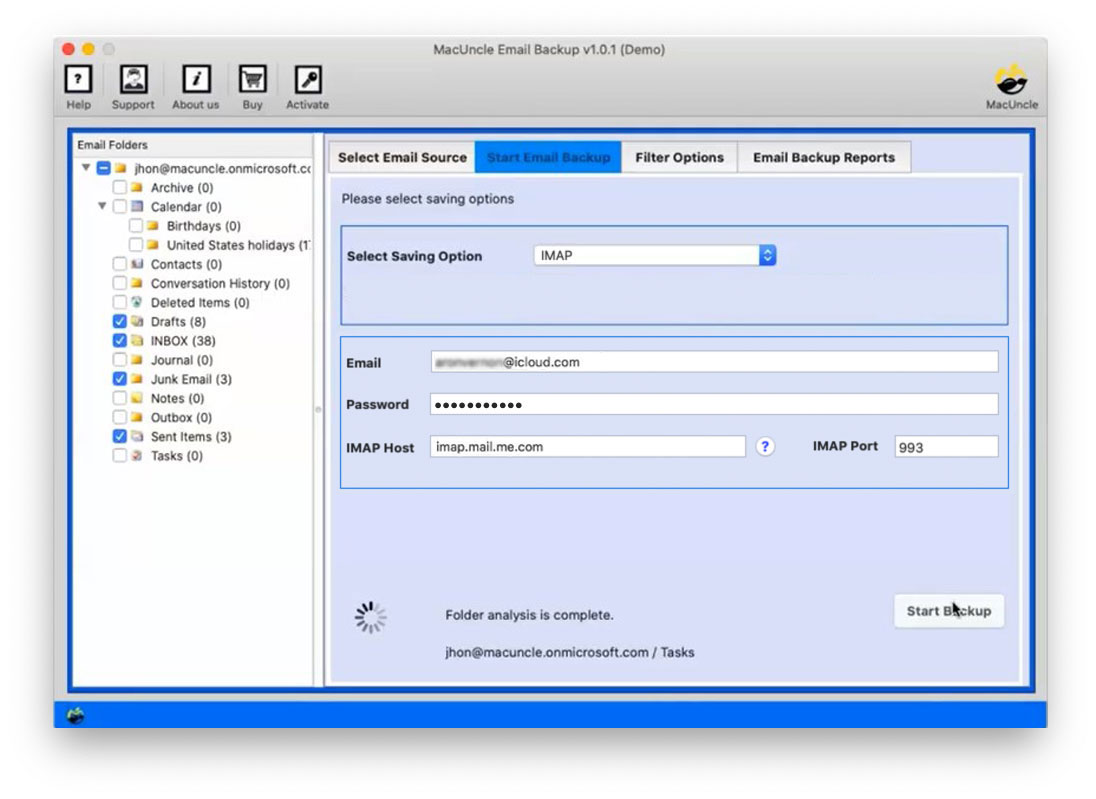
- Step 4: Then select the IMAP option from the Select Saving Option.
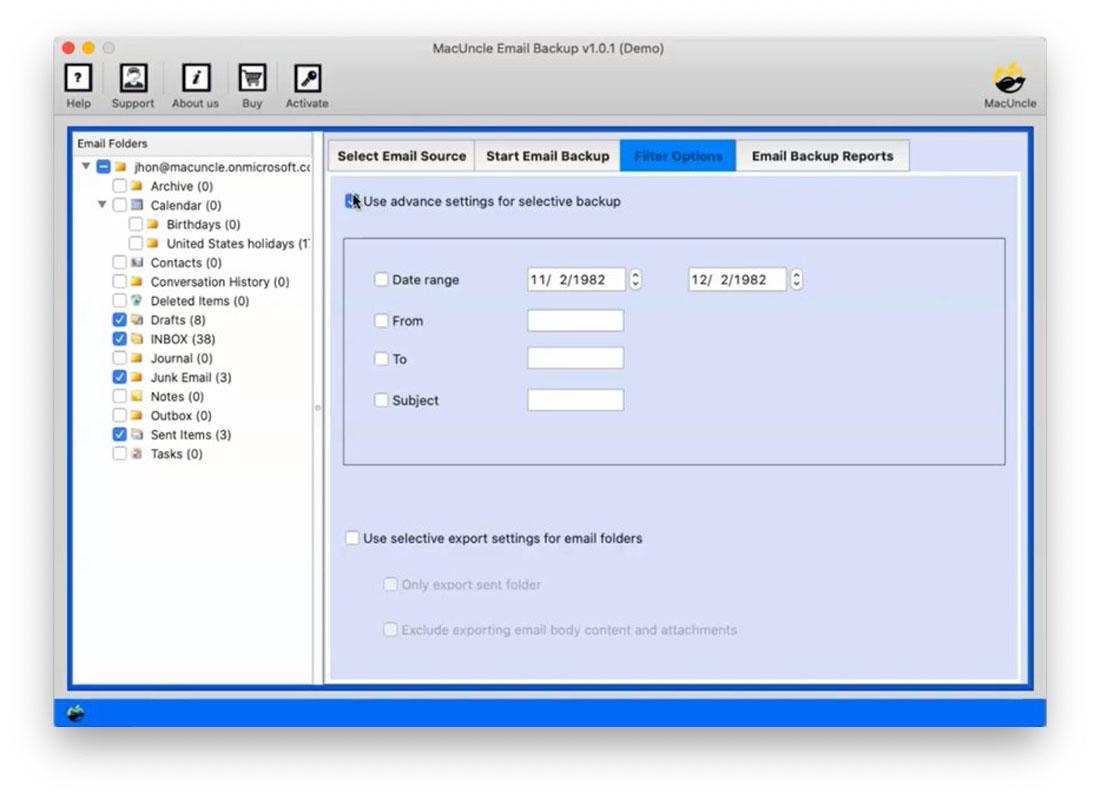
- Step 5: For Selective Migration, use the Filter option: Filter out emails according to Date, From, To, and Subject or import only the send folder.
- Step 6: Now, enter the iCloud account address and password. Also, enter the IMAP host & IMAP port.
- Step 7: To proceed, press Start Backup. In a few minutes, all the selected emails, contacts, calendars, etc., will be transferred.
We can easily evaluate the solution for transferring Office 365 contacts to iCloud as one of the fastest available at present. Advanced technological expertise is not mandatory for the migration process. It lets users switch email contacts and calendars from Office 365 to iCloud.
Summarize
You can efficiently transfer Office 365 to iCloud, including all emails and other data, using the software. To maintain a connection with a business client, the Office 365 Address Book is crucial. That is why people always need those important contacts on their cell phones. Therefore, in this article, we have discussed different situations where there is a requirement to transfer the O365 address book.
Also read: Export Office 365 Contacts to CSV on Mac
FAQ
Q1) Is it possible to try the software before buying the purchase key?
A1) Yes, get the demo version of Office 365 to the iCloud wizard. And import 25 email files without causing any modification to the data included in the account.
Q2) Does this approach export contacts from Outlook Office 365 to iCloud?
A2) Yes. You can effortlessly import contacts from Office 365 to iCloud using the recommended application. Just select the desired folder and transfer the files.


